Baked Cheesy Yellow Squash Chips – A Healthy and Crispy Snack
Introduction
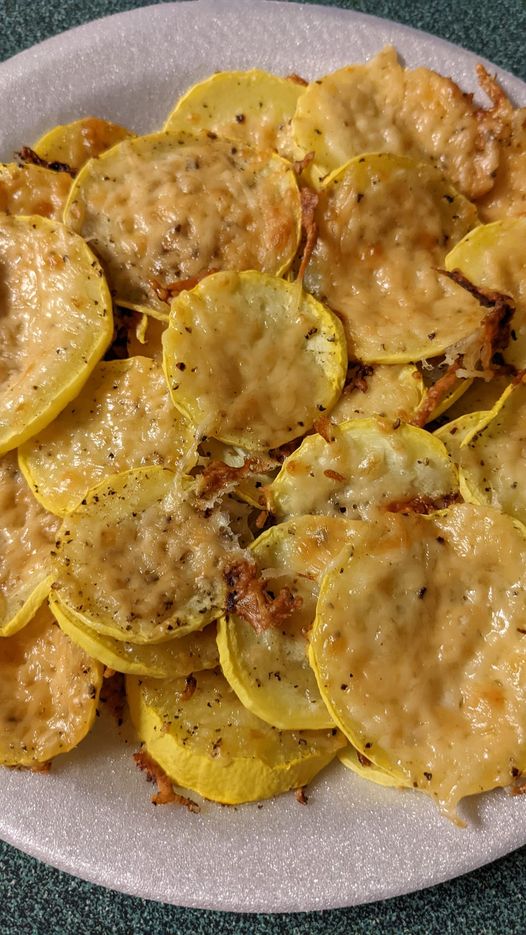
If you’re looking for a healthier alternative to traditional chips, these Baked Cheesy Yellow Squash Chips are perfect! With tender, golden squash slices topped with melted cheese and a burst of flavor from seasonings, this easy recipe offers a guilt-free yet delicious snack. Ideal as an appetizer, snack, or side dish, these cheesy squash chips are sure to be a hit with family and friends!
Ingredients
For the chips:
- 2 medium yellow squash
- 1/2 cup shredded cheese (cheddar, mozzarella, or a cheese blend)
- 1 tablespoon olive oil
- 1 teaspoon garlic powder
- 1/2 teaspoon dried basil
- Salt and freshly ground black pepper to taste
- Fresh cilantro or parsley (optional, for garnish)

Instructions
Step 1: Preheat the Oven and Slice the Squash
- Preheat your oven to 375°F (190°C) and line a baking sheet with parchment paper for easy cleanup.
- Wash and dry the yellow squash. Slice it into thin rounds, about 1/8 inch thick. Using a mandolin slicer ensures that the slices are uniform and cook evenly.
- Spread the squash slices out in a single layer on the prepared baking sheet.
Step 2: Season the Squash
- Drizzle the olive oil over the squash slices and toss to coat them evenly.
- Sprinkle the garlic powder, dried basil, salt, and pepper over the squash slices. Make sure each piece is well-seasoned.
Step 3: Bake the Squash
- Place the baking sheet in the preheated oven and bake for about 15-20 minutes or until the squash is beginning to turn golden brown and crispy at the edges. Halfway through the baking time, flip the slices to ensure even cooking.
- If needed, bake for an additional 5-10 minutes until the squash slices are crispy and lightly golden.
Step 4: Add the Cheese
- Remove the squash from the oven and sprinkle the shredded cheese over the top of each slice.
- Return the baking sheet to the oven and bake for an additional 5-7 minutes, or until the cheese is melted and bubbling.
Step 5: Serve and Enjoy
- Allow the cheesy squash chips to cool for a few minutes before serving.
- Optionally, garnish with fresh cilantro or parsley for a burst of color and freshness.
Tips for Making Perfect Cheesy Squash Chips
- Thin, even slices: Make sure the squash slices are of even thickness so they cook uniformly.
- Cheese options: Feel free to mix and match cheeses! A blend of mozzarella and cheddar will give you a gooey texture and rich flavor.
- Use a mandolin slicer: A mandolin slicer will help you achieve thin, even slices for the perfect crispy texture.
- Crispy perfection: Don’t overcrowd the squash on the baking sheet, as this will prevent them from crisping up evenly.
Serving Suggestions
- Serve these cheesy squash chips as a standalone snack or alongside a hearty sandwich or grilled chicken for a satisfying meal.
- Pair with your favorite dip such as ranch, spicy salsa, or even a zesty aioli for extra flavor.
- For a fun twist, add them as a topping to a fresh green salad for a crunchy, cheesy addition.
Conclusion
Baked Cheesy Yellow Squash Chips are an easy-to-make, crispy, and healthier alternative to regular chips. Full of flavor and texture, these chips offer a light and satisfying snack that everyone can enjoy. With just a few ingredients, they make for a perfect low-carb snack or side dish that’s both delicious and nutritious.
Call to Action
Made these Baked Cheesy Squash Chips? Let us know how they turned out in the comments below! Don’t forget to share your photos on social media and tag us! Be sure to save this recipe for your next snack craving—you’ll love how easy and tasty it is!